Most of your accounts will be customer accounts, with no admin access, or super user accounts, high level accounts with complete admin access. But Ultra Commerce offers highly customizable admin permissions – with Permission Groups, you can control any level of access desired. For example, you may need Customer Service accounts to be able to access accounts and orders, but they can’t be able to create products. Or you may need a Warehouse Manager account, who has access to fulfillment batches and stock information. You can set all that up using our Permission Groups feature.
1. Create a New Permission Group
To access the Permission Groups listing:
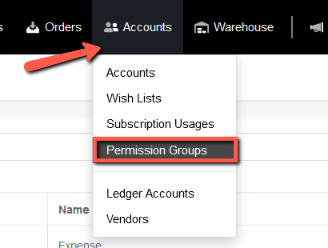
- Click on the Accounts tab on the Ultra Commerce toolbar.
- Select Permission Groups from the drop-down.
To create a new Permission Group:
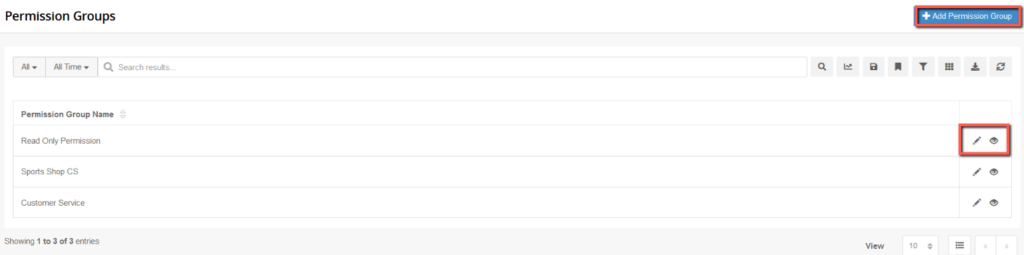
- Click the blue + Add Permission Group button on the Permission group listing page.
On the Create Permission Group form that appears:

- Enter the name of the Permission Group in the space provided
- Enter a unique Permission Group Code.
- Click Save.
The permission group detail screen will appear.
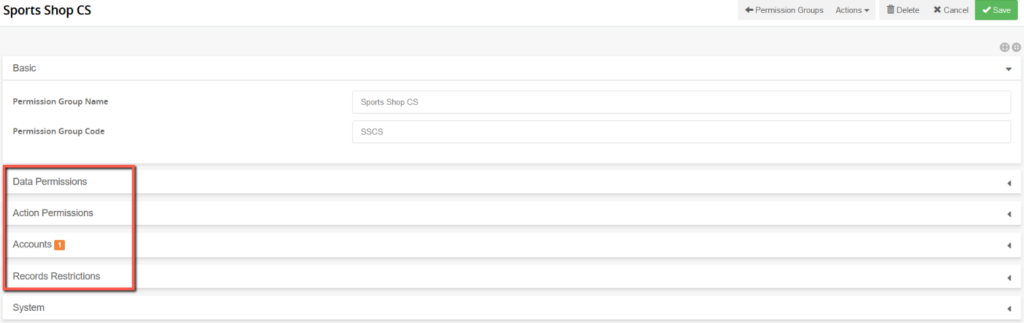
There are two main tabs; Data Permissions and Action Permissions; that need to be expanded and then the appropriate permissions need to be checked off.
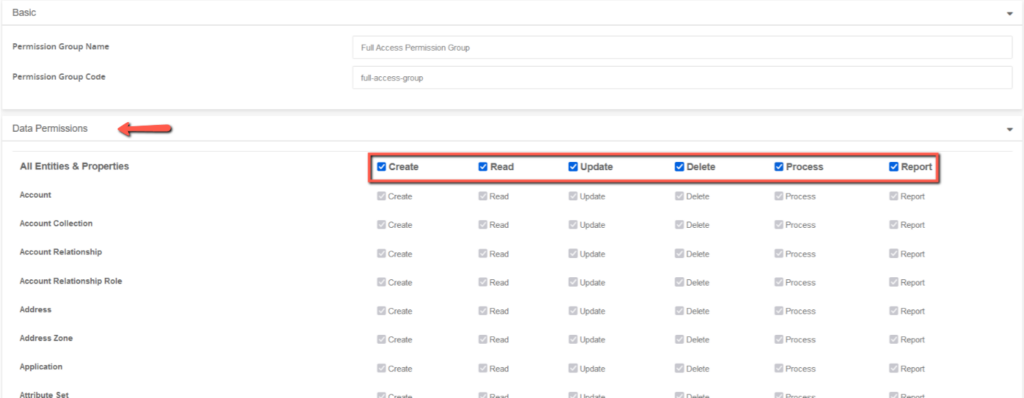
Under the Data Permissions tab, you may check the entities/properties you would like to include (data you would like the user type to be able to access or change). If you are granting complete permission, you can click the upper level check box for Create, Read, Update, Delete, Process and Report or just check off the desired permissions.
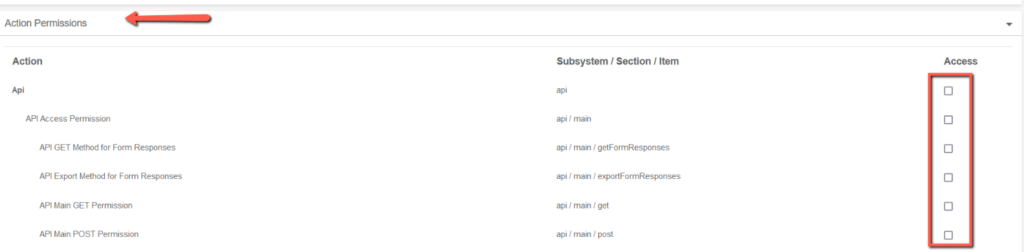
Under the Action Permissions tab, you may select what actions the account needs to perform. These are separated into distinct sections, and will include any third party integration permissions.
- Click Save in the upper right hand corner to make the changes permanent.
View the Accounts
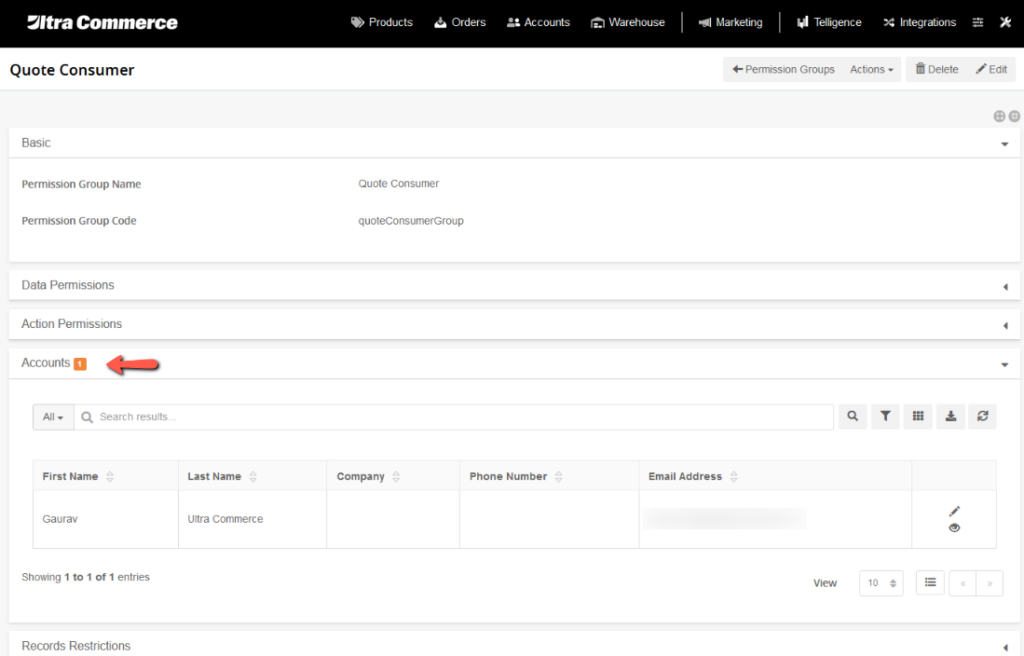
The Accounts tab displays what accounts have been assigned to the permission group. You assign accounts to permission groups through the accounts listing
2. Add an Account to a Permission Group
To add an account to a group,
- Select Accounts from the Ultra Commerce navigation toolbar at the top of the screen and
- then select Accounts from the drop-down.
The Accounts listing page will display
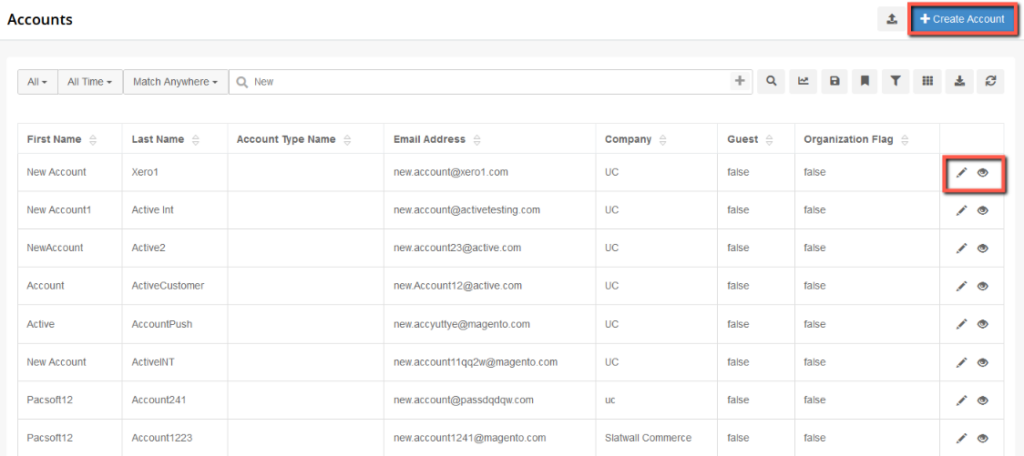
- Click the edit (pencil) button next to the user account you’d like to add to a group. You will now see the Account detail for this user account.
- Expand the Permission Groups tab and check off the group or groups to which you’d like to add this account.
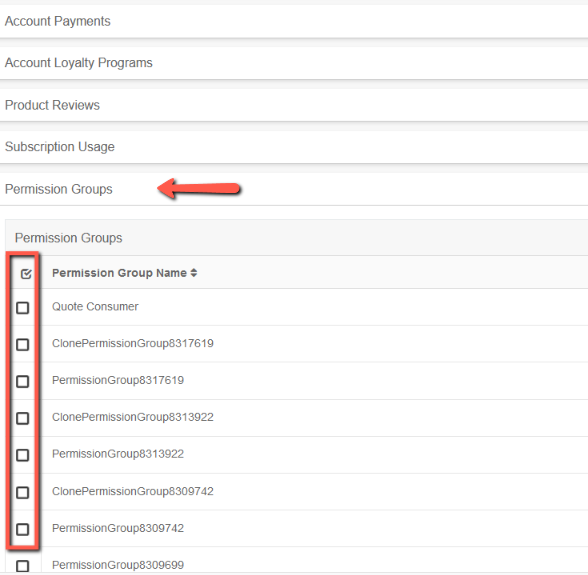
- When you are finished, click Save.
The Accounts that are added to the permission group will also display on the Accounts tab on the permission group detail.