1. Getting Started – Prerequisites
In order to run a local instance of the Ultra Commerce React storefront on your machine, there are a number of environmental requirements.
Install Node.js
Firstly you will need to install node.js “v16.6.0” built with current templates on your operating system of choice. https://nodejs.org/en/download/
Tip: We recommend using node version manager and switching between versions easily if running multiple projects on a different version.
Setting the $PATH
For Mac users, ensure your $PATH variable is correct and matches.
/usr/local/bin |
https://stackoverflow.com/questions/7703041/editing-path-variable-on-mac
Install NPM & NPX
Next update the node version by running the following terminal command
sudo npm install npm --global |
Install npx via this terminal command:
sudo npm install -g npx |
Create Storefront & React App
Create the React environment with this command:
npx create-react-app my-new-storefront --template @ultracommerce/cra-template-ultra-commerce-storefront |
Tip: ‘my-new-storefront’ is the name of your new project. By default, this will download a variety of this project, not the full source code but will be a fully functional app.
Ok to proceed? (y) |
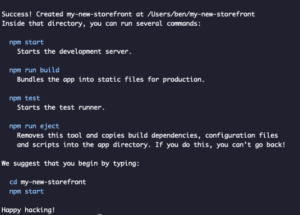
Type y and hit enter. A number of dependent packages will be installed over a few minutes.
After a successful installation, you should see this message.
2. Ultra Commerce Source Code
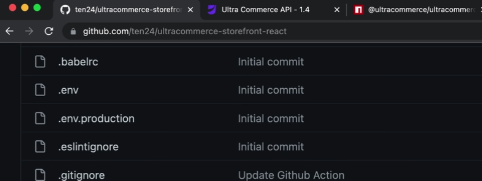
You can navigate to Github to access the complete Ultra Commerce source code for the React template and other helpful documentation. https://github.com/ten24/ultracommerce-storefront-react
3. Ultra Commerce API

Ultra Commerce is a headless eCommerce platform driven by API and an SDK.
The complete Developer API documentation is found here. https://publicapi.ultracommerce.co/
You can view this complete API in Postman and pull in the collection to run it and test scripts against your environment. Its purpose is to demonstrate all of the public APIs we offer.
The storefront ties back into the API and has been wrapped in a Javascript SDK that works via browser JS or node server. The SDK also includes helpful links back to Postman and the Ultra Commerce React Storefront. This code is also available via the Github repository.
Tip: Code releases are generally built and published on a monthly basis.
4. Ultra Commerce SDK
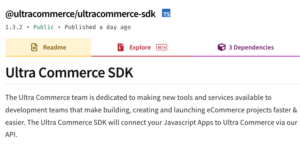
This SDK below is the exact same that Ultra Commerce uses to build the storefront
https://www.npmjs.com/package/@ultracommerce/ultracommerce-sdk
5. Creating your Storefront
Let’s start reviewing the core codebase. To do this, you will need a preferred visual tool installed. We suggest Visual Studio Code, it’s free and can be downloaded for your operating system of choice. https://code.visualstudio.com/download
Follow this stack overview guide to allow you to open code directly from the Mac Terminal command line. https://stackoverflow.com/questions/29971053/how-to-open-visual-studio-code-from-the-command-line-on-osx
Run the following terminal command to open the code.
code -n my-new-storefront |
Once VS Code is installed and running, open the folder “my-new-storefront/”
Next we can edit the basic configuration variables by selecting “.env” from the left navigation pane. In order for the site to function, a setting is required for the follow 4 x variables.
REACT_APP_SITE_CODE= REACT_APP_API_URL= REACT_APP_ADMIN_URL= REACT_APP_HOST_URL= |
Site code is the name of the site inside your Ultra Commerce instance you wish to run against. Ultra Commerce supports multiple sites so be sure to select the one you wish to use.
URL for API and host/admin URL’s need to be added.
Tip: If you are using Kontent or another application, you will need to modify the .env property accordingly
You can use the following example:
REACT_APP_SITE_CODE=sports-shop REACT_APP_HOST_URL=https://uc-develop.ultracommerce-dev.co/ REACT_APP_API_URL=https://uc-develop.ultracommerce-dev.co/index.cfm/ REACT_APP_ADMIN_URL=https://uc-develop.ultracommerce-dev.co/index.cfm/ |
Next open the terminal window in Code: code → terminal → new terminal
Run the following command
npm run start |
Visual Studio Code will fire up a browser instance of the Storefront on http://localhost:3006/
You should now see the Ultra Commerce React Storefront running.

Storefront Basic Authentication
If you’re blocked from accessing the website by a basic authentication login box, you will need to sign in with the following credentials.
Username: Ultra Password: 10Yellow24 |
Tip: This will not work on an iPhone due the way basic auth is handled.
6. Site Dependencies
To view the complete list of website dependencies, click on the ‘package.json’ file on the left hand navigation pane.
"dependencies": {
"@kentico/kontent-delivery": "^10.4.1",
"@palmabit/react-cookie-law": "^0.6.2",
"@sentry/react": "^6.19.7",
"@sentry/tracing": "^6.19.7",
"@ultracommerce/ultracommerce-sdk": "^1.3.2",
"@ultracommerce/ultracommerce-storefront-react": "^2.0.1",
"bootstrap": "^5.1.3",
"bootstrap-icons": "^1.8.3",
"braintree-web": "^3.85.3",
"dayjs": "^1.11.2",
"formik": "^2.2.9",
"glob": "^7.2.3",
"i18next": "^21.8.5",
"jwt-decode": "^3.1.2",
"paypal-checkout": "^4.0.336",
"prop-types": "^15.8.1",
"query-string": "^7.1.1",
"react": "^17.0.2",
"react-content-loader": "^6.2.0",
"react-cookie": "^4.1.1",
"react-datepicker": "^4.8.0",
"react-dom": "^17.0.2",
"react-error-boundary": "^3.1.4",
"react-gtm-module": "^2.0.11",
"react-helmet": "^6.1.0",
"react-i18next": "^11.16.9",
"react-loading-overlay-ts": "^1.0.5",
"react-mailchimp-subscribe": "^2.1.3",
"react-redux": "^7.2.8",
"react-router": "^5.3.3",
"react-router-dom": "^5.3.3",
"react-slick": "^0.28.1",
"react-toastify": "^8.2.0",
"react-use": "^17.4.0",
"redux": "^4.2.0",
"redux-devtools-extension": "^2.13.9",
"redux-thunk": "^2.4.1",
"reselect": "^4.1.5",
"rxjs": "^6.6.7",
"slick-carousel": "^1.8.1",
"source-map-explorer": "^2.5.2",
"sweetalert2": "^11.4.17",
"sweetalert2-react-content": "^4.2.0",
"url-encode-decode": "^1.0.0",
"validator": "^13.7.0",
"web-vitals": "^2.1.4",
"yup": "^0.32.11"
|
Tip: This version of the storefront is meant to serve as a starting point for building out a client project. This is important to understand as this will include the full source code as a package dependency, so if we look at the directory tree, we will not see a complete exhausting list of all the pages. We will load in all of the pages that are available in this package, but for right now, it is pulling in code, page and prebuild configuration.
A benefit in building your package like this vs direct from source code is that it will be much easier to to update in the future.
By default the storefront will pull in CMS content, core products, fully function search and search products in the sandbox environment.
At this point, you can now log in with the same username & password on the UC admin side.
Here you should be able to add an item to cart, view the cart, checkout, change item quantity etc.
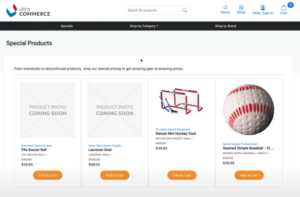
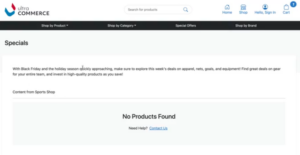
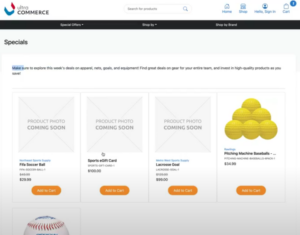
There is some pre-loaded CMS content with specials via the UC CMS. This can include products, CMS or brands that need to be highlighted. All content is pulled via the API’s.
7. Diving into Source Code
index.js
This is the initial entry point for the application. Here we set up our contact store via Redux as its application store.
ReactDOM.render(
// <React.StrictMode><Provider store={store}>
<Router>
<App />
<AnalyticsManager />
</Router>
</Provider>,
// </React.StrictMode>
document.getElementById('app')
|
We are using React Router App is our primary Application.
Analytics is holding Cookie popups or any other analytics you need to do in the position.
app.js
//https://itnext.io/react-router-transitions-with-lazy-loading-2faa7a1d24a
export default function App() {
const loc = useLocation()
const routing = useSelector(state => state.configuration.router)
const shopByManufacturer = useSelector(state => state.configuration.shopByManufacturer)
// eslint-disable-next-line no-unused-vars
const cms = useCMSWrapper()
// eslint-disable-next-line no-unused-vars
const scroll = useScrollToTop()
const dispatch = useDispatch()
useEffect(() => {
dispatch(getConfiguration())
}, [dispatch])
useEffect(() => {
console.table({ Client: process.env.REACT_APP_VERSION || 'missing', Core: process.env.REACT_APP_CORE_VERSION || 'missing', SDK: process.env.REACT_APP_SDK_VERSION || 'missing' })
}, [])
|
We can see that this is handling all the initial bootstrapping for the application, getting CMS content data, setting up our routing and a full list of pages that are supported.
You can add, remove and rename pages, some pages have explicitly expecting URL’s. For any custom pages, it should be created under this folder and add it and register as a route and it will start displaying.
home.js
The homepage (home.js) offered by Ultra Commerce is out of the box, but most clients prefer to customize this page, however using this default page is the quickest route we have to achieve a minimum viable product.
To demonstrate how easy this is to modify, we can remove the following line and the slider from the home page disappears.
<ContentSlider slider={slider} />
|
And now let’s bring the news section to the top by grabbing this line and moving it higher on the home.js page.
<LatestNews /> |
Move this to the top and save, and the site will hot-reload automatically and you should see your changes live.
8. Diving into Complete Source Code
This section is designed to show the difference between running the Ultra Commerce Storefront application with full source code as opposed to the project we created earlier.
Firstly you will need to pull down the completed source code. You can use Github to ‘add’ → ‘clone repository’ → ‘URL’ → https://github.com/ten24/ultracommerce-storefront-react
Next open the folder → select the location you save this source code too.
Below is an expanded view of the folder structure from the complete source.
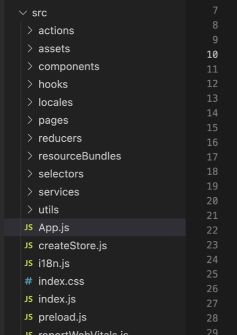
Next, we will learn how to customise the ‘latest news’ component.
You will notice there are many other folders not included with the default template project typically because they are not needed as they can be pulled from the core library.
The > ‘actions’ and > ‘reducers’ folders outline all of the Redux actions & reducers available.
The > ‘assets’ folder includes the primary javascript for loading in any javascript bundles and scss file.
The template and full source both contain assets, theme.js and app.scss – the difference is scss is pulled from the library rather than local to the project.
To add any custom .scss it’s done via > src → assets → custom → *.scss files
Tip: This application does support multi-language, however the > ‘locales’ folder should never be edited as they will always be overwritten at build time.
At build, the application reads from the en.properties file that will take keys and generate the json files for them.
The > ‘selectors’ folder is used for the package reselect to make accessing the Redux store easier and remove some boilerplate code.
The > ‘services’ folder, includes any of the API’s interacted with, including CMS’s for Contentful, Kontent, SlatwallCMS and our API service (SDK).
The > ‘utilities’ folder is for common util easier.
From the > pages → Home.js we load all the components we need from the homepage.
You would opt to use the source directly for complete customisation, override functionality, custom functions, and recreate functions by bringing into the client project and changing functionality there.
As an example, we will be changed the ‘latest news’ component. To do this, we navigate to > src → components → Blog → LatestNews.js copy this file and paste this file under the my-new-storefront → src → components → paste
Next we will update the import statements on line 3 of the Home.js to pull from the library as opposed to locally in the project.
import { ContentSlider, ProductSliderWithConfig, BrandSlider, ContentColumns, Layout, LatestNews, ContentBlock, ActionBanner } from '@ultracommerce/ultracommerce-storefront-react/components'
|
Update several of the lines from LatestNews.js so the original matches the new version below
Original
import React, { useEffect } from 'react'
import { useTranslation } from 'react-i18next'
import { useSelector } from 'react-redux'
import { Link } from 'react-router-dom'
import { SimpleImage } from '..'
import { useGetBlogPosts, useUtilities } from '../../hooks'
import { useFormatDate } from '../../hooks/useFormatDate'
import { getBlogRoute } from '../../selectors/configurationSelectors'
|
New
import React, { useEffect } from 'react'
import { useTranslation } from 'react-i18next'
import { useSelector } from 'react-redux'
import { Link } from 'react-router-dom'
import { SimpleImage } from '@ultracommerce/ultracommerce-storefront-react/components'
import { useGetBlogPosts, useUtilities, useFormatDate } from '@ultracommerce/ultracommerce-storefront-react/hooks'
import { getBlogRoute } from '@ultracommerce/ultracommerce-storefront-react/selectors/'
|
Where ../../ is replaced by @ultracommerce/ultracommerce-storefront-react
Now navigate to Home.js and remove the ‘LatestNews’ coming from the package so its like the below line.
Before
import { ContentSlider, ProductSliderWithConfig, BrandSlider, ContentColumns, Layout, LatestNews, ContentBlock, ActionBanner } from '@ultracommerce/ultracommerce-storefront-react/components'
|
After
import { ContentSlider, ProductSliderWithConfig, BrandSlider, ContentColumns, Layout, ContentBlock, ActionBanner } from '@ultracommerce/ultracommerce-storefront-react/components'
|
Next add this new line to import the new file
import { LatestNews } from '../../components/LatestNews'
|
Tip: While this may seem tedious to duplicate code like this, bringing it out of the core code package and displaying it out here, it is the most React way as React chooses to favor composition over inheritance. A complete copy of this component would need to be added to the client project for any more extensive customisation that is not available by augmenting the component through React properties.
Both projects can be run exactly the same. If we review the packages.json file it’s slightly different, however, the start command is here using the build it start command.
"build": "npm run mt; react-scripts build", |
We are using rollup to build and publish this app, but if you chose to run from the source you will need to update build scripts to be able to build this project not as a bundle, but as an application.
You can see what these commands are by looking at the client project.
9. Customisations – Without Duplicating Code
Starting with the > preload.js file, this holds all of the configurations for this application and everything will be loaded in from core first and then you can customise.
Most of this will likely not be touched, but there is a key for the blog if you want this from a different URL key – Eg: calling it ‘LatestNews’.
There is a configuration for specifying CMS providers, configuration for products, product prices, and the ability to change the product listing pages.
If you search on the storefront site, this brings up the Product listing page
Under preload.js → listing: { you can see we are requiring a filter to be selected of either ProductType, Brand or Category to be selected before we allow any of the other autogenerated filters to be displayed
forcedFilterOptions: ['productType_slug', 'brand_slug', 'category_slug'] |
The page will update and you’ll notice that many more search facets will be available. There are all generated automatically from UC admin when you add products.
Typically you don’t have to worry about these as they will automatically be returned and displayed in the UI.
For example, if you have no use for ‘Brand’, Ie; you have a single Brand store, you can easily remove this option.
If you are running a multisite setup you can modify this value to be ‘true’.
applySiteFilter: false, |
Inventory tracking, you would apply the stock filter to ‘true’.
You can also choose not to return the filter if you wish to paginate through filters or even shut off the SKU count.
By default, Ultra Commerce has configured a number of filters to run out of the box. This includes price range, page size, etc.
There is a configuration for analytics, ie Tag manager ID which will automatically reflect in the app’
You can form an id that’s generated on Ultra Commerce admin that’s meant to work with the provided contact page.
Adding a multi-site: example would be for different languages, locales, project sets or different brands at the same company.
10. Configuring CMS Providers
From the ‘my-new-storefront’ application, we will demonstrate how to change the CMS from the default inbuilt Ultra Commerce CMS to Kontent & Contentful CMS’s.
Inside the preload.js file, we can change the variable here to reflect
cmsProvider: 'slatwallCMS', |
cmsProvider: 'Kontent', |
As soon as you save this file, you will see the website instantly reflect changes that are now shown from Kontent, it’s that simple to change CMS as the storefront is hot-swappable for any CMS of your choice.
Below are examples from each CMS system. We also have a Kontent payload we can provide that you can load into your external CMS instance so you can get up and running quickly and see what is available from that CMS directly
UC CMS
Kontent CMS
Contentful CMS