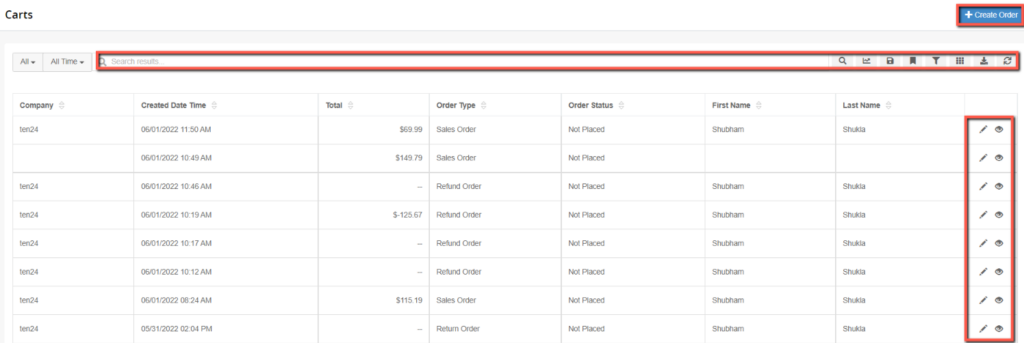
Administrators can easily create Orders through the admin of Ultra Commerce. There are two important areas in Ultra Commerce that list orders depending on their status: Carts Listing and Orders Listing. When a sales order is initially created and order items have been placed in the cart but the order has not been placed, the orders will be found on the Carts Listing. This is a great place to be able to see abandoned carts and get insights about the carts through the reporting/collections feature of Ultra Commerce.
After the sales order or return order has been placed it will be found on the Orders listing. So, if you leave your Order after placing the order, but have not fulfilled the order yet or need to cancel, reopen the order or return or exchange the order, the Orders Listing is where you will want to go.
1. Orders
The Orders listing is where any sales, return or exchange Orders that have been placed will be found and can be viewed or edited.
To access the Order Listing:
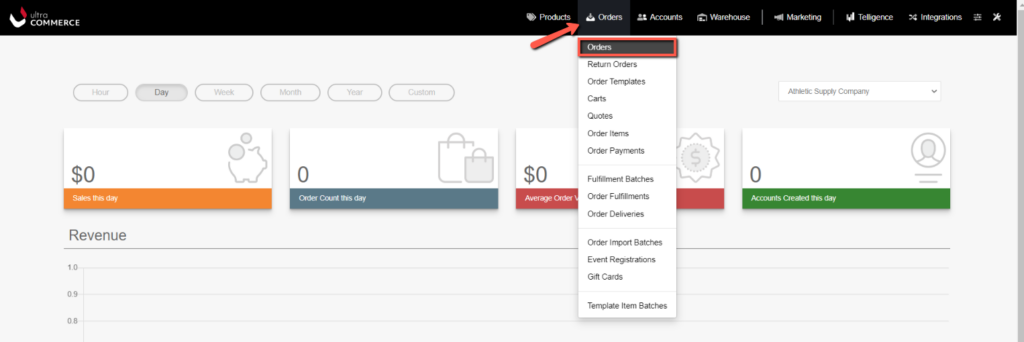
- Select Orders from the Ultra Commerce Toolbar
- Click Orders from the drop-down.
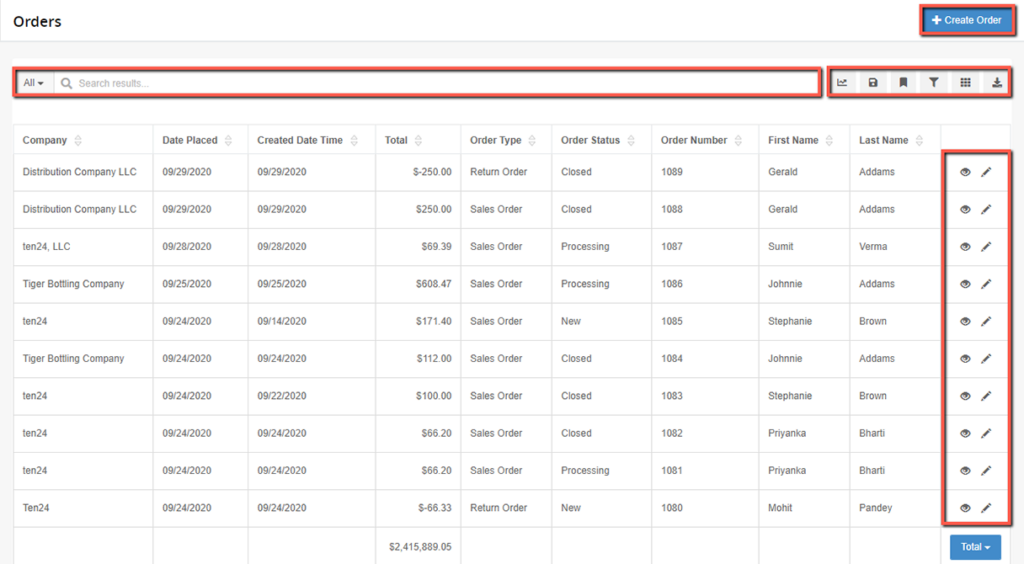
From the order listing screen you have the ability to:
- Sort the placed Orders by clicking the ascending/descending arrows for Company, Date Placed, Created Date Time, Total, Order Type, Order Status, Order Number, First Name, Last Name.
- Search the orders, create reports, add and save filters through the personal collections bar at the top of the listing.
- Edit or View already placed orders
- Create Orders.
2. Carts
The Carts listing is where you can create a new sales order, or if you stepped away from your cart before placing it, you can view or edit it.
To access the Carts Listing:
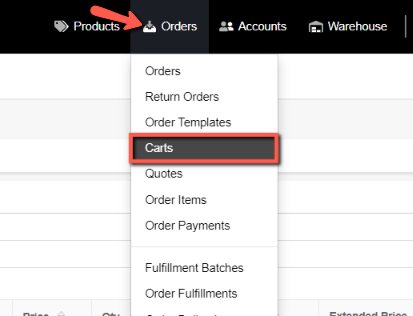
- Select the Orders tab from the Ultra Commerce Toolbar
- Click Carts from the drop-down.
3. Create an Order or Cart
To create an order in the Ultra Commerce admin, start by clicking +Create Order in the upper right of the page.
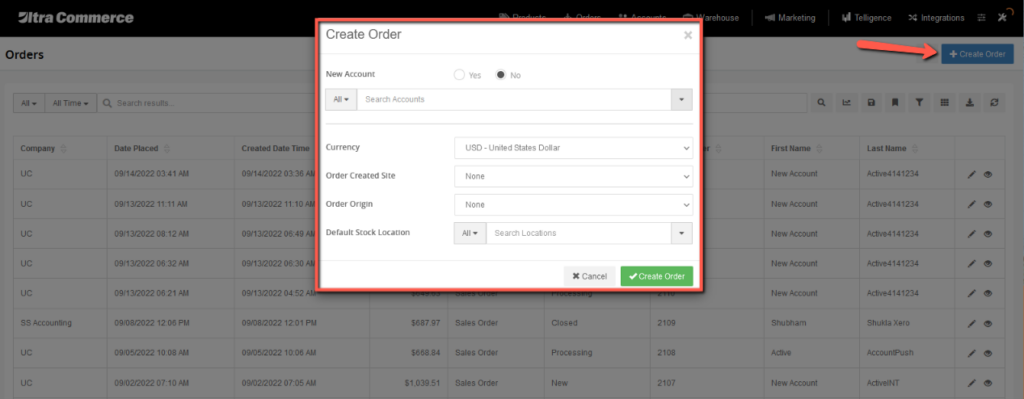
A modal window will appear to add the following information:
- New Account: Indicate whether you are creating an order for a new or existing account. If yes is selected, the create account fields will appear. If no is selected, you will need to search for the account using the typeahead.
- Currency
- Order Created Site
- Order Origin
- Default Stock Location
- Click Create Order
You will now arrive on the order detail page. Some of the information you just input on the previous page should be viewable in the Basic tab.
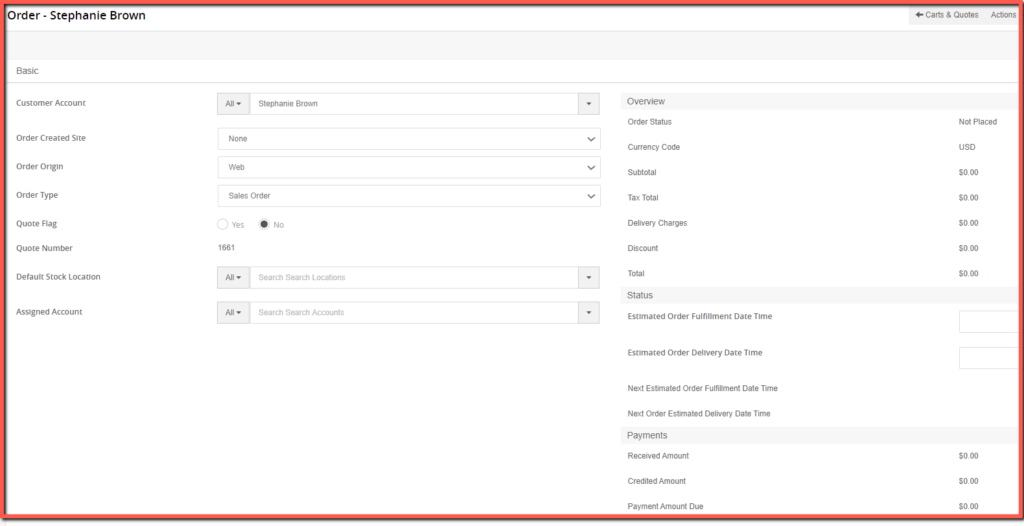
Below the basic tab are other tabs.

To add order items:
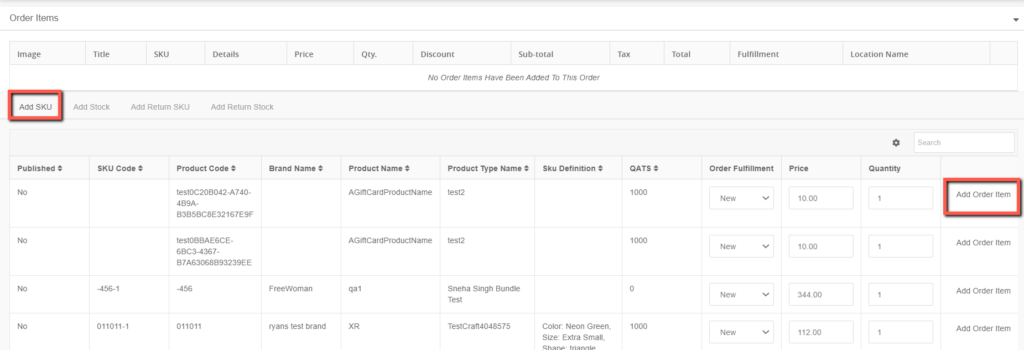
- Make sure you are in Edit mode.
- Expand the Order Items tab.
- Navigate to the sku listing below the Order Items table.
- Here you can search for & add any skus to the order.
- You can update the quantity or apply a different price if desired.
- Depending on the item selected, you may need to input shipping information or other data in the modal window that opens after the item is added.
- Save the order.
You now have a cart, for it to be an order you need to place it by following the next steps.
4. Placing an Order
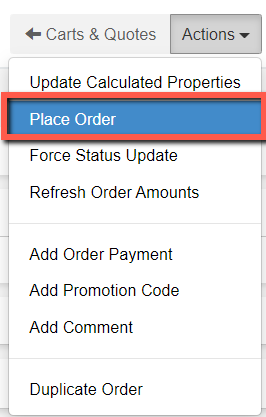
Next you will want to place the order, which can be done after shipping and payment options have been selected.
After you have at least 1 item in the cart, navigate to the Actions menu at the top of the order. Click Place Order.
The modal window may or may not require the following information:
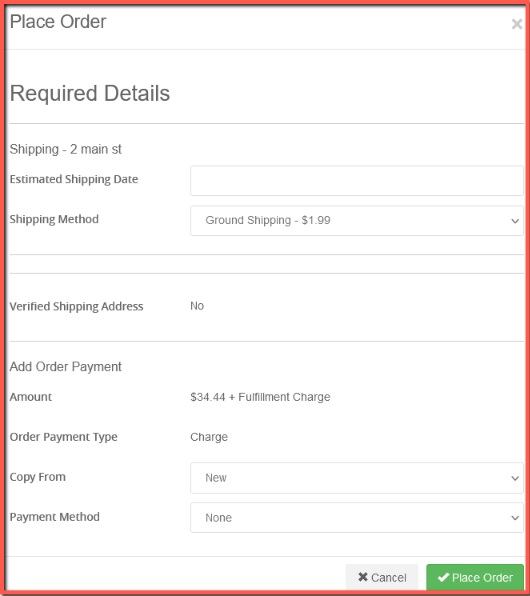
- Estimated Shipping Date
- Shipping Method
- Add Order Payment: Copy From an existing Payment Method
- Add Order Payment: New Payment Method
Once the appropriate information has been entered, click Place Order.
You will see your order’s status has been updated to Processing – typically for items that need to be gathered up and then shipped. This status may vary, for example, if you have a product with an email type fulfillment, the status could be Closed. The order will be found in the Orders listing section of the admin.