Attribute Sets are really helpful for extending Products and Sku data as well as other data for other objects such as Accounts, orders etc outside of our out of the box options.
1. Create a Product Attribute Set
To create an attribute set:
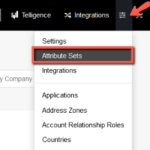
- Click Config on the Ultra Commerce toolbar.
- Select Attribute Sets.
From here, you can view and edit existing attribute sets, or create a new one.
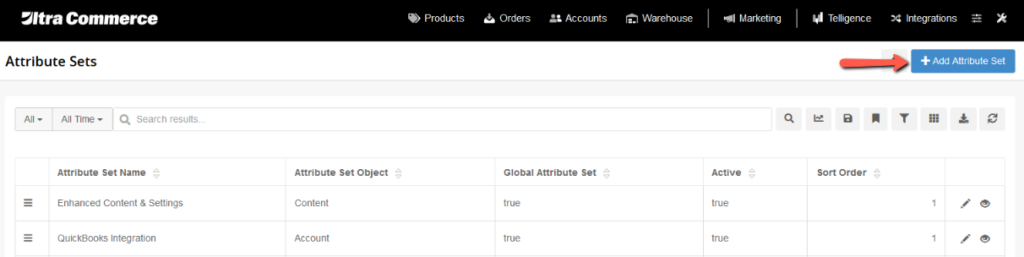
- Begin by clicking the blue + Add Attribute Set button on Attribute set listing page
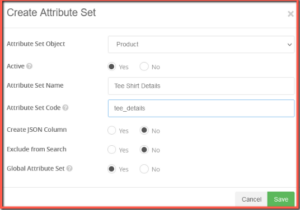
On the Add Attribute Set modal:
- Set the Object to Product from the drop-down choices.
- Choose a descriptive Attribute Set Name which clearly indicates the product this set will define,
- Choose an Attribute Set Code which relates to the name (for example, “T-Shirt Details” for Name and “TeeDetails”).
- If this will be an attribute for all products, set Global Attribute Set to yes, otherwise, set it to no. If set to No, once the set has been created, you will have to select product types to which this set applies from the Product Types tab of the attribute set detail page.
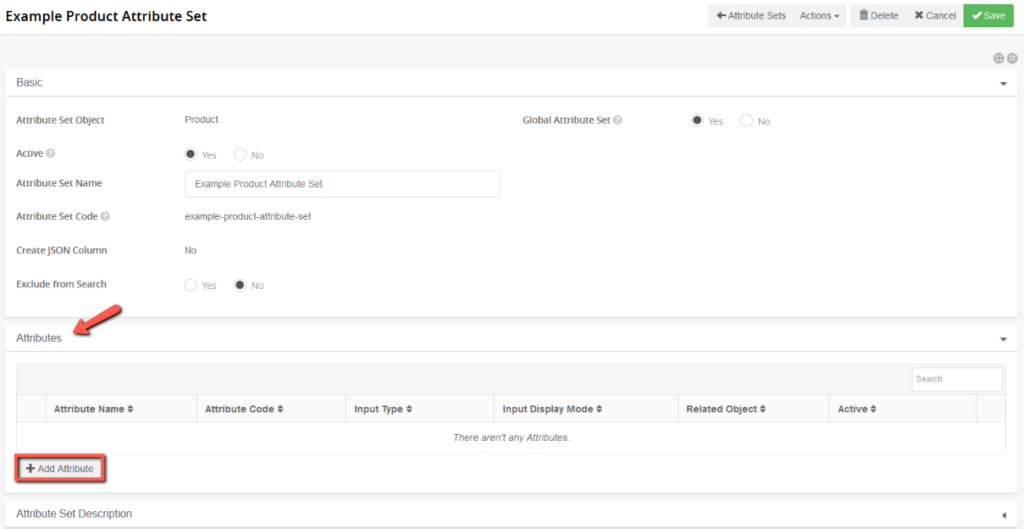
- Clicking Save will bring you to a detail page for the attribute set, which lists all attributes within the set, a description (if desired), and a tab for product type assignment if this is not a global attribute set. If this is a new attribute set, it will have no attributes, so add one by clicking + Add Attribute.
 Your product attribute needs are likely to vary widely, from extended options for products (for example, the ability to mark whether any product is a gift) to additional text (for example, a description of shirt materials or a history of the organization that makes the shirt). Any product page field that does not come standard in Ultra Commerce will likely require making extended product attributes to implement.
2. Add Attribute(s) to the Attribute Set
To add a new attribute to a set on the Attributes tab of the detail page:
- Click + Add Attribute.
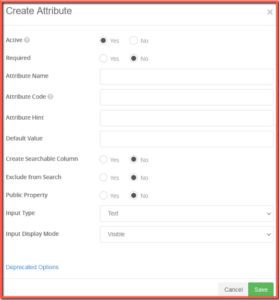
On the Create Attribute modal:
- Input an Attribute Name and Attribute Code that will help identify the attribute. For our T-Shirt example, you might add Rich Text Editors (see input type, below) called “Sizing Explanation” (code: sizingExplain) and “About Company” (aboutComp). Any text entered into Attribute Hint will display on the frontend if coded to do so. For attributes that will or could have multiple options, enter a Default Value of 1. For attributes that are inherently solitary (such as those text editors), leave this blank.
- Input Type determines the means by which users will interact with this attribute, and the input type you choose is heavily dependent on the nature of the attribute. Text will provide a basic box into which a Product editor can input a line of information to display on the page; Text Area is for multiple lines; a Rich Text Editor will generate a WYSIWYG editor. For customizable products, Radio Group, Select Boxes, and Multi-select may be more useful. If you want to give the customer the ability to mark some products as gifts, you would create a Yes/No attribute with a name like “Is this a gift?” (code: giftable).
- Save your attribute.
3. Add Attribute Options to your Attribute
This step is not necessary if your input type is for example a text box with no predefined options and in this case, you will remain on the Attribute Set detail page.
If your attribute has an option-utilizing input type such as a Radio Groups, Select Boxes, and Multi-selects, you will be brought to the Attribute detail page after you save your attribute and you will need to add options for your Attribute.
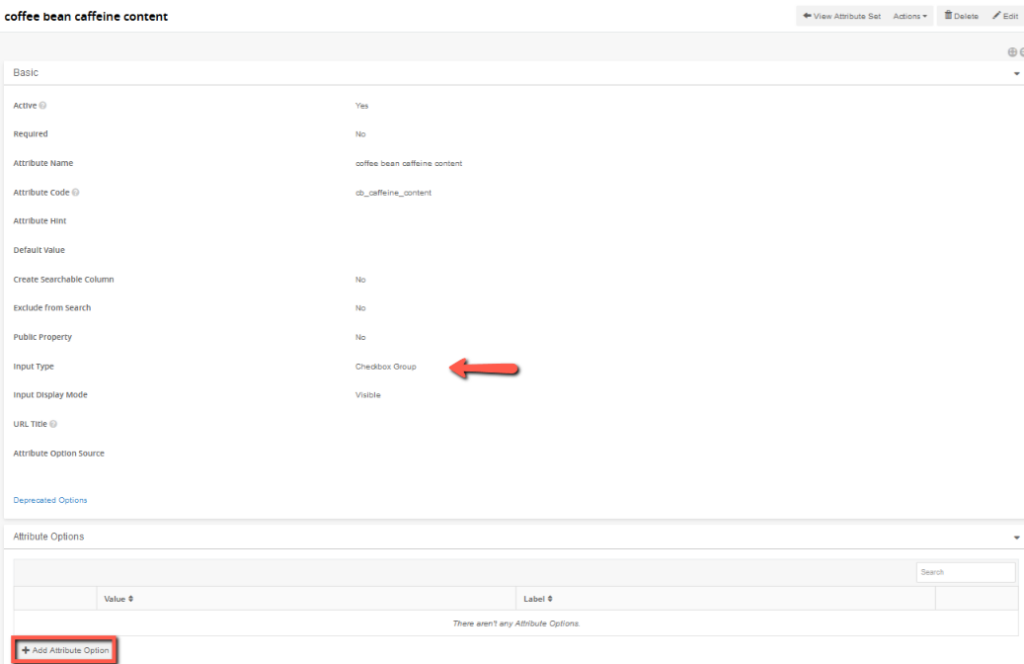
For example, if you added a product select box attribute called Bean Caffeine Content you would then need to define each of the Options for each select box. In order for such attributes to be useful you must have at least one option
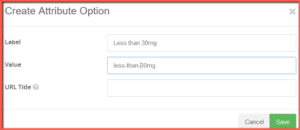
- Click + Add Attribute Option. An attribute option has two parts: a Value (use consecutive integers) and a Label.
For attributes with multiple options, remember that the Default value will dictate which option is the default. If you set Default Value to 1 when creating the attribute, remember to change it later to reflect your actual desired default’s value.
Remember to assign this attribute set to product types if it is not global. Any product that falls under the type(s) you assign this attribute set to will now have an additional tab with the attribute set name on which all attributes in the set will be displayed and editable.