Price groups are designed to give certain accounts access to special, predetermined pricing that is different from what is listed on the site. Price groups, unlike promotions, are not meant to expire and are tied to specific assigned accounts. No promotion codes are necessary.
1. Create a Price Group
Navigate to the Price Groups section of the site:
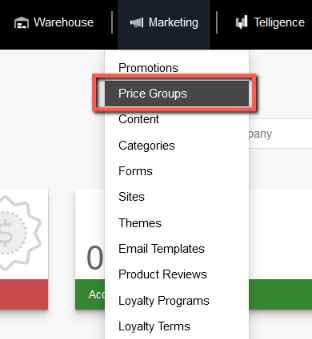
- Click on Marketing from the Ultra Commerce toolbar.
- Select Price Groups from the drop-down.
The Price Groups listing screen will appear.
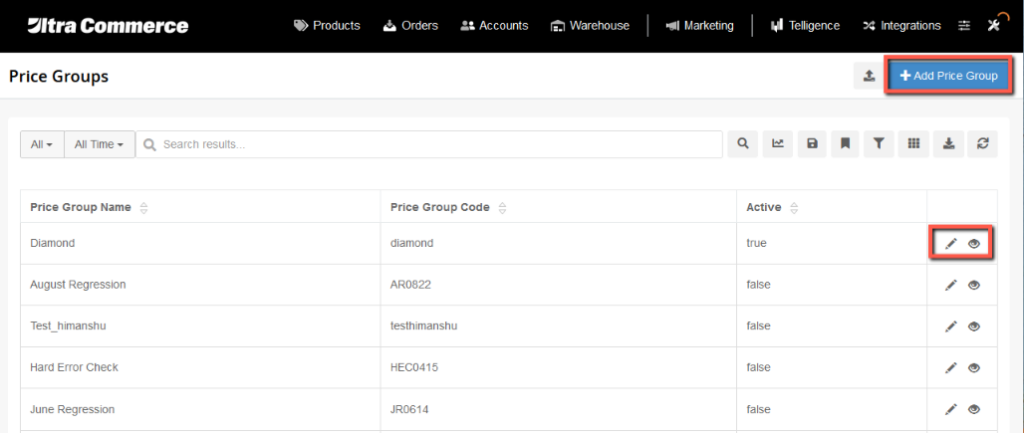
To create a Price Group, click the blue +Add Price Group button.
On the Create Price Group page:
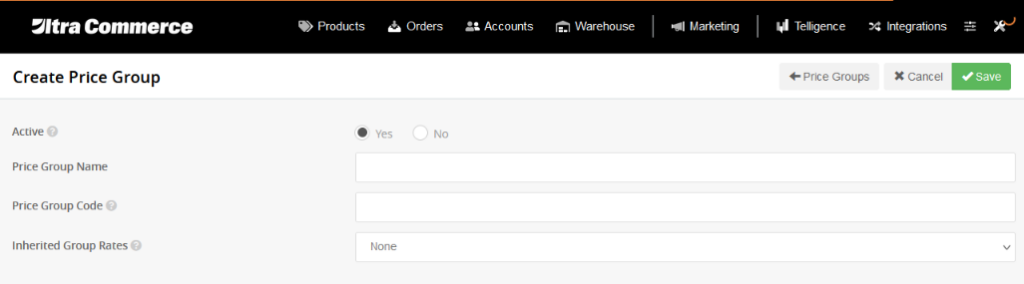
- Enter the Price Group Name
- Enter a unique Price Group Code.
- Click Save.
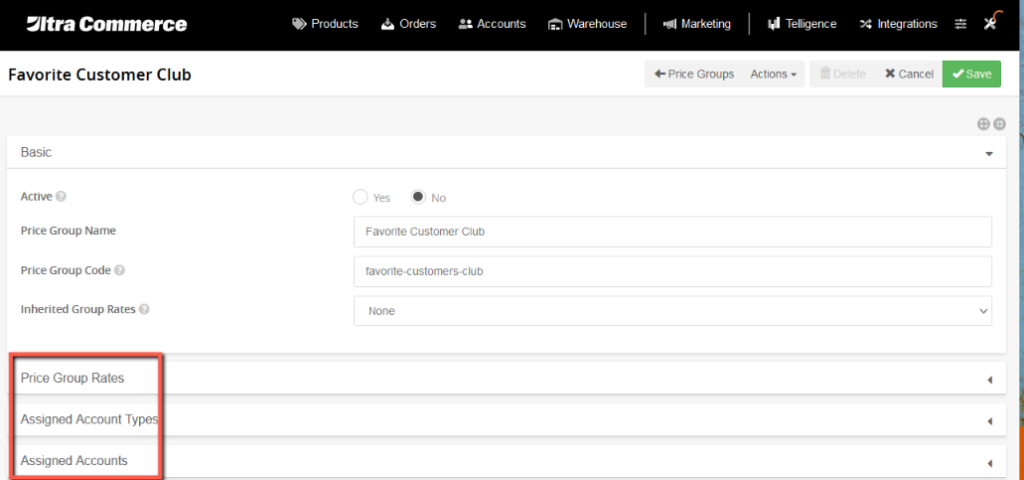
The price group detail page will display with a few tabs: the price group rates tab, assigned account types and the assigned accounts tab.
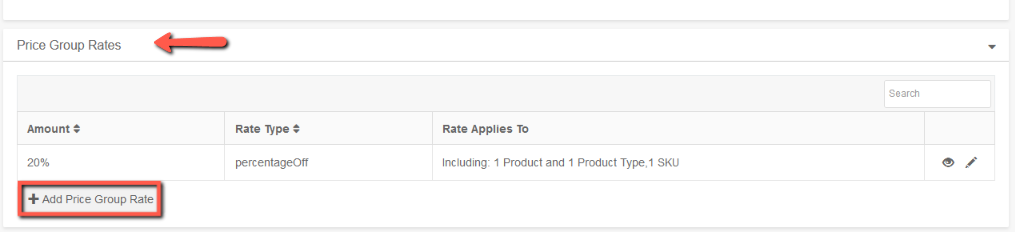
2. Configure Price Group Rates
On the Price Group Rates tab you will see already added rates. To add additional Price Group Rates, click the Add Price Group Rate button.
The Create Price Group Rate Modal will appear:
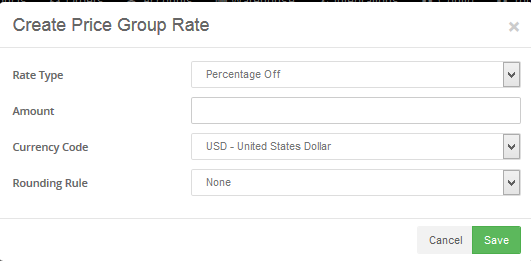
- Select the desired Rate Type and Amount.
- Amount Off: Items listed below are reduced by the fixed amount entered in the box to the right.
- Percentage Off: Items listed below are reduced by the percentage indicated. Number must not include “%” symbol. If percentage off is chosen, a Rounding Rule must also be applied. A Rounding Rule determines how the discount will be applied if prices are not exact dollar amounts.
- Fixed Amount: Items listed below will all share the same price.
- Example: If “9.95” is entered into the box to the right, all products added to a cart for a member of this price group will display with the price, “9.95.”
- Select the Currency Code.
- Clicking Save will bring you to the page for the price group, where you can select (from the corresponding tabs) the Product Types and/or Products to which the benefits of this price group apply.
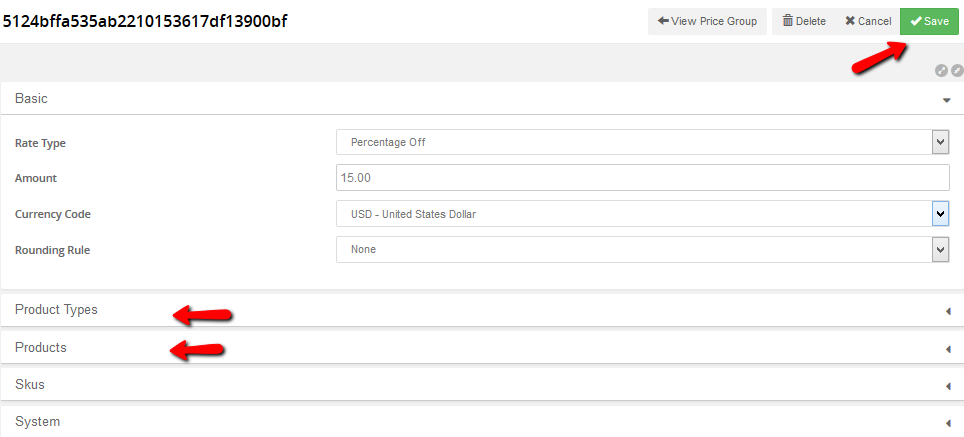
Note: If a Product Type is selected on the tab and added to the price group, (for example let’s say you are including all merchandise products) you do not need to also select all individual merchandise products on the Products tab. Use the Products tab ONLY if you would like a specific individual product or products, as opposed to the entire product type, to be included in the price group.
When finished, press Save.
3. View Assigned Accounts
Once you have created your price group it is time to assign accounts to it. This is done through the Account detail page of the Ultra Commerce admin.
To view Price Group accounts, on the Price Group detail expand the Assigned Accounts tab.
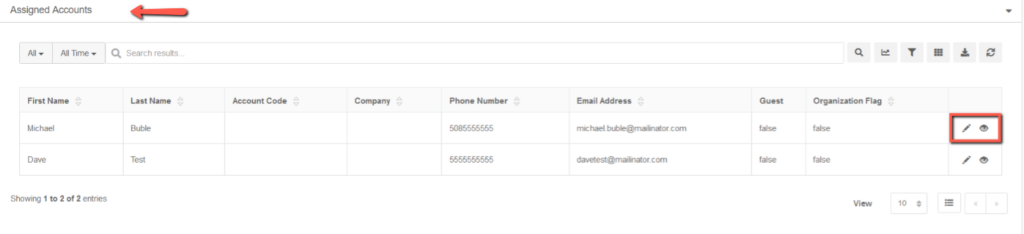
If you click on the pencil icon or the eye icon to the right of an account on the tab, it will take you to the account page either in edit or view mode. You can then make any necessary adjustments – if you would like to remove the account from this price group you can from the account detail > price groups tab of the account.