Promotions are designed to assign special pricing to products, product types, or shipping. They can be applied through either coupon codes or automatically. Promotions, unlike pricing groups, are able to expire and are not tied to specific accounts.
1. Create a Promotion
To create a new promotion from the Ultra Commerce toolbar:
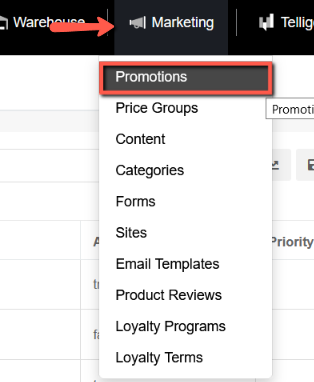
- Click Marketing.
- Select Promotions from the drop-down.
This will bring up the Promotions listing page.
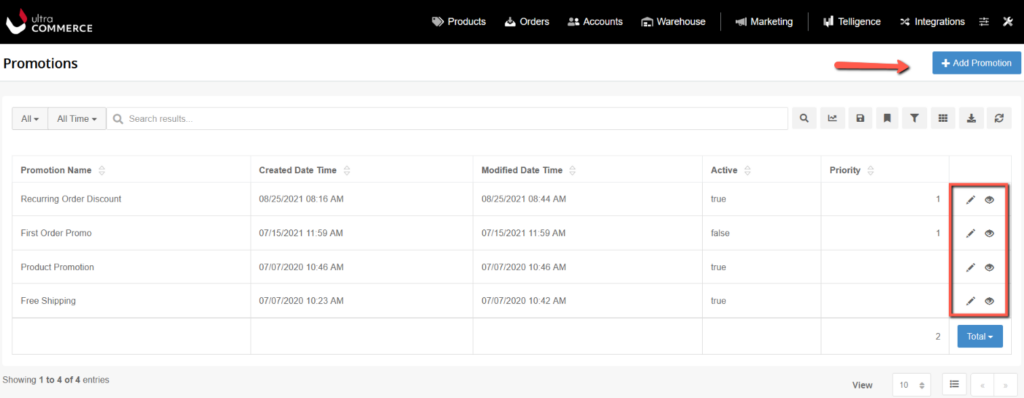
- Click the +Add Promotion button in the upper right corner of the Promotion listing screen.
From the Create Promotion screen, you can begin to configure the promotion:
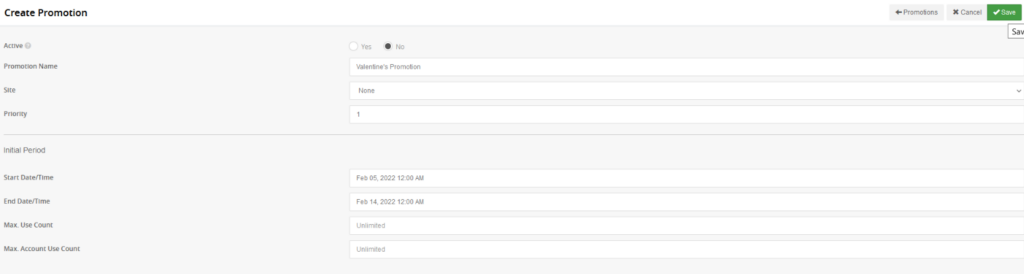
- Set Active to Yes or No. It defaults to No while the promotion is being created. Once complete, be sure to change this to Yes.
- Enter a Promotion Name that clearly describes the promotion.
- Enter a Site if the promotion applies to a specific site.
- Fill in the Priority field with a number. It defaults to 1. If an order qualifies for multiple promotions this determines the one that gets applied first.
- Set a Start Date/Time and End Date/Time between which the promotion will take place. If you leave these fields blank, the promotion will have a forever promotion period so it would not expire.
- Max. Use Count: If this promotion is limited (for example, you only want the first ten customers to get the early-bird special) then enter the maximum (say, 10) here.
- Max. Account Use Count: If this promotion is limited by person (i.e. only once per customer), then enter the maximum (say, 1) here.
- Max. Use and Max. Account Use can be used together or separately. For example: first ten orders, only once per customer; first ten orders, but one customer could place all ten orders; unlimited orders but only once per customer, etc. If you do not want to limit access to the promotion, simply leave these boxes empty and the promotion will remain active for all orders placed during the appointed time.
- Click Save.
2. Configure the Promotion Period
The Promotion Periods tab is where you can view your list of promotion periods and access them to edit/add rewards and qualifiers. Each period can have distinct rewards and qualifiers. When you create a new promotion a promotion period is created during this process.
From the Promotion detail screen:

- Expand the Promotion Periods tab.
- Click the pencil icon on the right of the desired promotion period. When you create a promotion, a promotion period is automatically created. You could also add another on this tab.
The Promotion period detail screen will display. Some of the data in these fields were added when the promotion was first created and can be edited if necessary here.
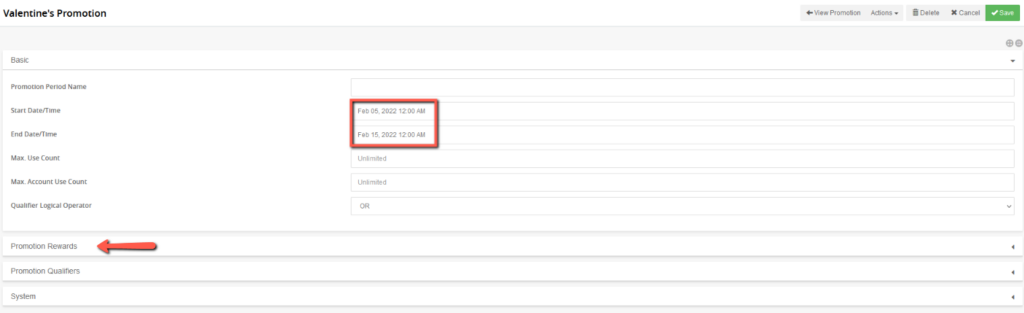
- Add a promotion period name in the field if desired.
- Check over the fields that you filled in previously – such as the start and end date/times and max use count and max account use count and change if necessary.
- Qualifier Logical Operator- Choose between And/Or it is set by default to Or. This refers to when you have multiple Promotion Qualifiers for a promotion reward. If Or is selected, that means the reward applies if one of the qualifiers is met, if And is selected, both qualifiers must be met for the reward to apply.
Promotions can be rerun or recreated. If you plan on using your promotion multiple times, this can be accomplished by adding another promotion period under the Promotion Period tab. New periods do not currently inherit rewards and qualifiers from previous periods, but the system does allow you to duplicate an existing promotion period if needed.
Note: A promotion period cannot be edited after it has been active, but you can add a new one.
On the Promotion Period detail screen you will see a couple tabs: Promotion Rewards and Promotion Qualifiers.
3. Configure the Promotion Reward
You will see that there aren’t any Promotion Rewards currently attached to the promotion. To add the promotion reward, expand the Promotion Rewards tab:
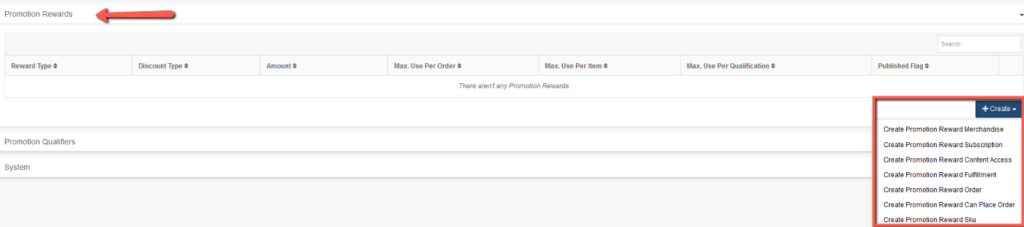
- Click the +Create button and select from a drop-down of possible rewards.
- Create Promotion Reward Merchandise: Use this to create rewards for merchandise products
- Example: 20% off all shampoos
- Create Promotion Reward Subscription: Use this to create rewards for subscription products.
- Example: $10 off all subscriptions for the month of July
- Create Promotion Reward Content Access: Use this to create rewards for content access products.
- Example: Student discount on content access to paywall-locked areas of the site
- Create Promotion Reward Fulfillment: Use this to create rewards for Fulfillments.
- Example: Free shipping on any order over $50
- Create Promotion Reward Order: Use this to create a reward for Orders.
- Example: 20% off your order with a coupon code.
- Create Promotion Reward Can Place Order
- This is a rarer use case, designed for orders where specific qualifications must be met in order for the order to be processed (usually a specific item must be added to cart)
- Create Promotion Reward Sku
- A reward sku would refer to an item that is automatically added to the cart once a qualifier is met.
- Create Promotion Reward Merchandise: Use this to create rewards for merchandise products
To illustrate the basic steps of creating a promotion reward, we’ll use Merchandise as the example. Click on the Promotion Reward Merchandise and a pop-up will appear.
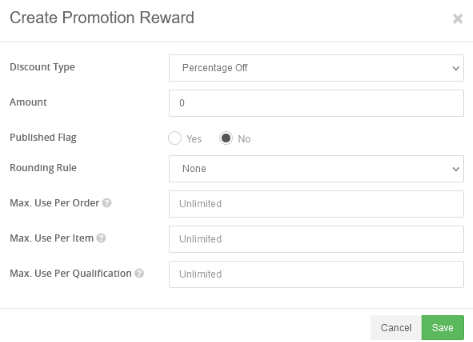
You will see the following options:
- Discount Type
- Percentage Off: use this if your promotion involves getting a percentage off, from 0 to 100.
- Example: “Buy One, Get One 50% Off,” this field would have a value of 50.
- Amount Off: use this if your promotion involves getting a fixed amount off.
- Example: “Spend fifty dollars, save ten dollars off your order,” this field would have an amount of 10.
- Fixed Amount – use this if your promotion involves paying a flat price.
- Example: “Buy three hats for twenty dollars” would be a fixed amount discount with an Amount of 20.
- Percentage Off: use this if your promotion involves getting a percentage off, from 0 to 100.
- Amount: the percentage, discount, or price of the reward (dictated by discount type)
- Rounding Rule: determines how the discount will be applied if prices are not exact dollar amounts. For example, if you have a percentage off discount and would like the final price not to be messy, you might dictate that the price round to the nearest dollar or .99.
- Max. Use Per Order: use this to limit the number of times the promotion can be applied to a single order. This number should always be larger than maximum use per item.
- Max. Use Per Item: use this to limit the number of times the promotion can be applied to a given item within an order, up to the maximum use per order.
- Max. Use Per Qualification: Vital for promotions where multiples of an item need to be purchased in order for a discount to be applied. Literally, “amount of times this promotion can be applied each time someone meets the criteria.”
- Example: “Buy One, Get One Free.” When a person buys two shirts, a 100% discount is applied — but only to one of those shirts. The visitor qualifies for the discount by buying two shirts, and for that qualification, one 100% discount is applied. If you don’t enter “1” into the box, the system will see the qualification and apply the 100% off to both shirts.
- Click Save.
Once you have saved your Promotion Reward, the Promotion Reward – Merchandise detail screen will appear.
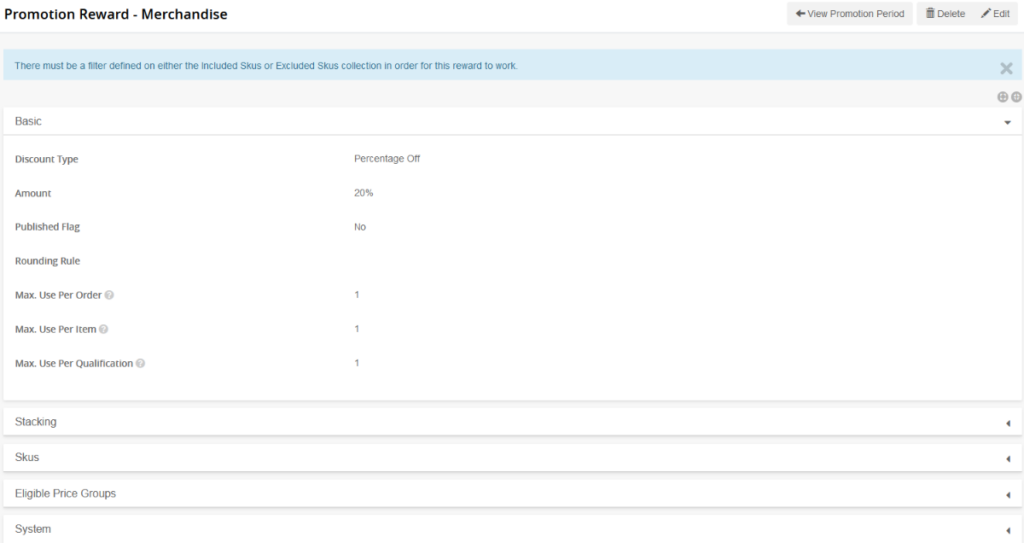
You will see the following tabs for Merchandise promotions – Stacking, Skus and Eligible Price Groups – that allow you to determine how this promotion will apply to orders. In order to start setting these up, click the pencil Edit button at the top right of the Promotion Reward – Merchandise screen. The screen will now be in edit mode.
Use the Stacking tab to control what other rewards can or cannot be combined with your reward if required.
- Expand the Stacking tab.
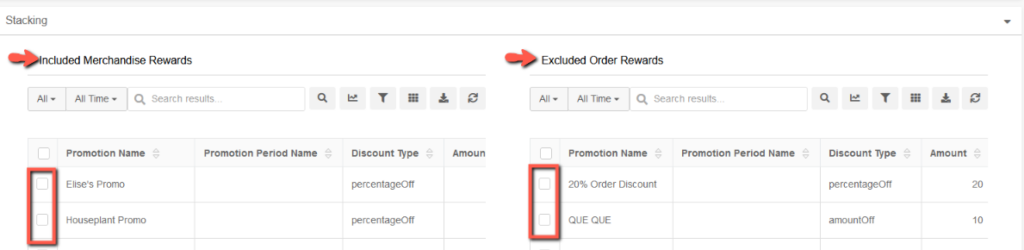
There are two columns:
- Included Merchandise Rewards: Check off the rewards that will be eligible to be stacked with the reward. The number that was included in the Priority field when you first created the promotions will determine the order in which the promotions are stacked.
- Excluded Order Rewards: Check off the rewards that will be excluded from combining with this reward. This is not necessary if Included Rewards are selected, or vice versa.
The skus tab is where the Included Skus or Excluded Skus in the Reward are selected.
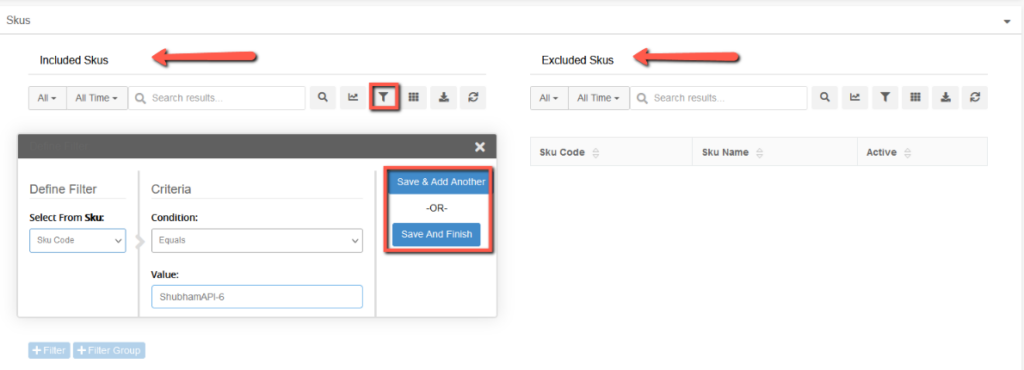
- Expand the Skus tab.
- Click the filter icon on the desired collection to open the filter modal.
- Select Sku Code from the Select from Sku drop down.
- If it is a specific sku or group of skus that the promotion applies to, set Condition to Equals.
- In the Value field put in the desired Sku.
- When you are finished, click Save.
If you wanted only members of certain price groups to be eligible for a discount, you could select them from the Eligible Price Groups tab.
4. Configure the Promotion Qualifier
Before explaining about creating Promotion Qualifiers, it should be noted that in some cases, Promotion Qualifiers will be unnecessary. For instance, if you are giving 10% off everything in your shopping cart, as long as something is in the cart, the promotion should apply. Additionally, if the promotion reward was set up to apply only to a specific product, setting up a qualifier is often unnecessary, as the promotion has already been filtered to only apply to that product.
In order to add a Promotion Qualifier:
- Click the pencil icon to the right of the desired promotion.
- Next, expand the Promotion Periods tab.
- Click the pencil icon of the desired promotion period and a new screen will appear – the promotion period detail.
From the Promotion Period detail screen:
- Expand the Promotion Qualifiers tab.
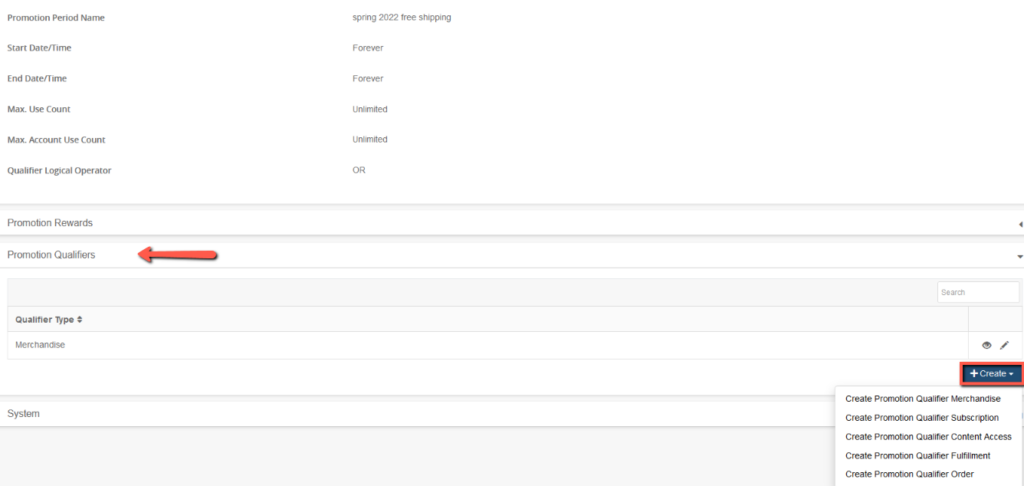
There are five kinds of Promotion Qualifiers available within Ultra Commerce (any of which can be added by clicking +Create):
- Create Promotion Qualifier Merchandise
- Example: Must have a specific item in cart to qualify for a discount
- Create Promotion Qualifier Subscription
- Create Promotion Qualifier Content Access
- Create Promotion Qualifier Fulfillment
- Example: Must select a specific fulfillment method to apply the discount
- Create Promotion Qualifier Order
- Example: Must have an cart with a certain total to qualify
For illustrative purposes, we will use a Merchandise qualifier type.
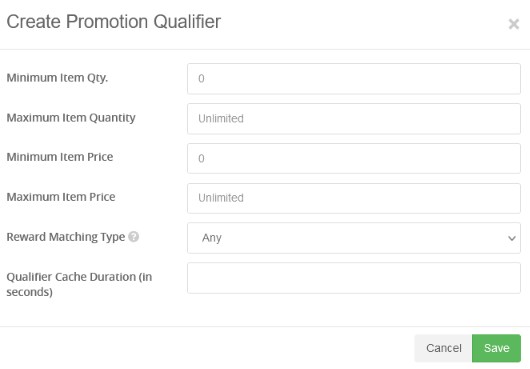
Here’s a quick rundown of the options you have available:
- Minimum Item Qty: The minimum number of items you must have in your cart to trigger the reward
- Example: “Buy-one-get-one (free, discounted, etc.) promotion,” this value would be two;
- Maximum Item Qty: The maximum number of items you can have in your cart before you no longer qualify for the promotion. Used when encouraging small quantities per customer.
- Minimum Item Price: The minimum price of items that will trigger the reward
- Example: The discount only applies to more expensive items.
- Maximum Item Price: The maximum price of items that will trigger the reward; for example, if your discount does not apply to more expensive items.
- Reward Matching Type (Sku, Product, Product Type, Brand): If the discount should only be applied to matching products/brands/etc., select that here. For example, if the reward is set to apply to a brand, then only items with that brand will be used to determine whether the cart qualifies to trigger the reward.
- Example: You are selling Pepsi and Coke, but the reward only applies to Coke products.
- Qualifier Cache Duration (in seconds)
- Save the qualifier
You will now be on the qualifier detail page.
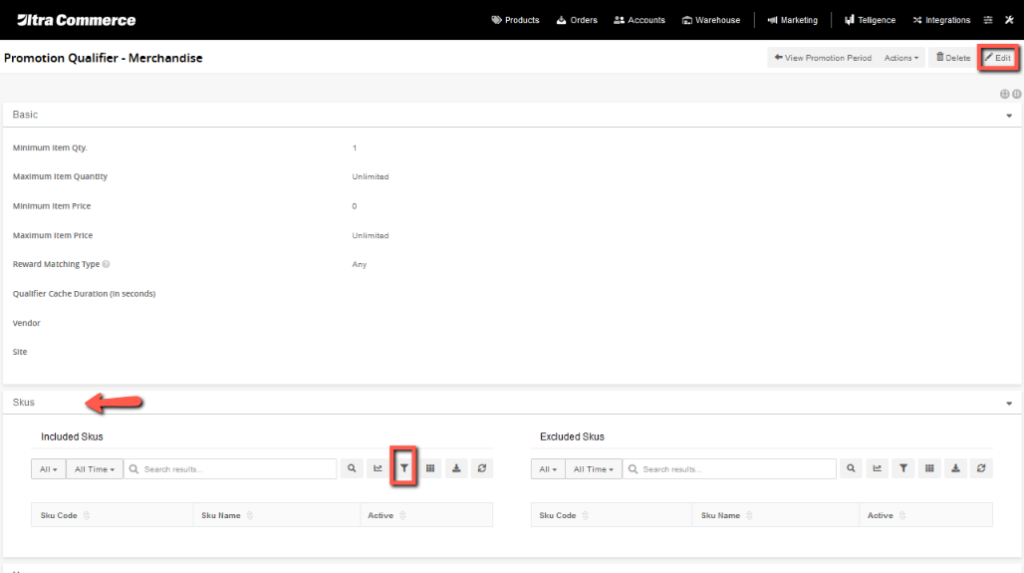
On the qualifier detail page, as with the Merchandise Reward, you can assign the qualifier on the sku tab the skus that must be included in the cart for the promotion to run. Ultra Commerce will compare the items chosen here with the items chosen under the Reward based on the reward matching type (if chosen) and calculate whether the items in the cart qualify for a given reward on that basis. If no items are selected, the qualifier will simply apply the min/max quantity/price and matching type settings for the entire cart.
5. Add a Promotion Code
By default, if no promotion codes are added to a promotion, promotion rewards will be automatically applied to qualifying orders for the duration of the promotion. However, if you would like to tie the promotion to a code, follow the steps below.
- Find the promotion you’d like to add a promotion code to and click the pencil icon.
- Below the basic tab of the promotion, expand the Promotion Codes tab.
- Click +Add Promotion Code to begin.
The Create Promotion Code modal will appear.
- Promotion Code: Enter a code by which the customer will apply the promotion.
- Start/End Date/Time: The period for which the code is functional.
- Max. Use Count: Number of times this particular code will be functional. If the code is eligible for the entirety of the promotion period, leave this box blank as it will default to unlimited.
- Max. Account Use Count: Number of times this code can be used for a single account. Should be less than or equal to Max. Use Count.
Fill in these fields and click Save. Now the promotion will only be applied when the customer enters the code in checkout.