Create a Merchandise Product
Before you start creating products, be sure that you have created any necessary Brands, Product Types, Option Groups, and Product Attributes for your products.
Navigate to the Product listing page:
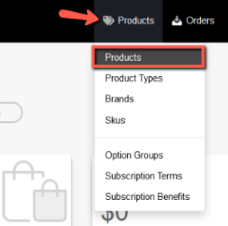
- Click on Products from the Ultra Commerce navigation toolbar
- Select Products.
The Product listing page displays all products that have been created. To start, we’ll create a Merchandise Product.

- Click on the blue +Create button at the top right corner of the screen.
- Select Merchandise Product from the drop-down.
The Create Product screen will appear.
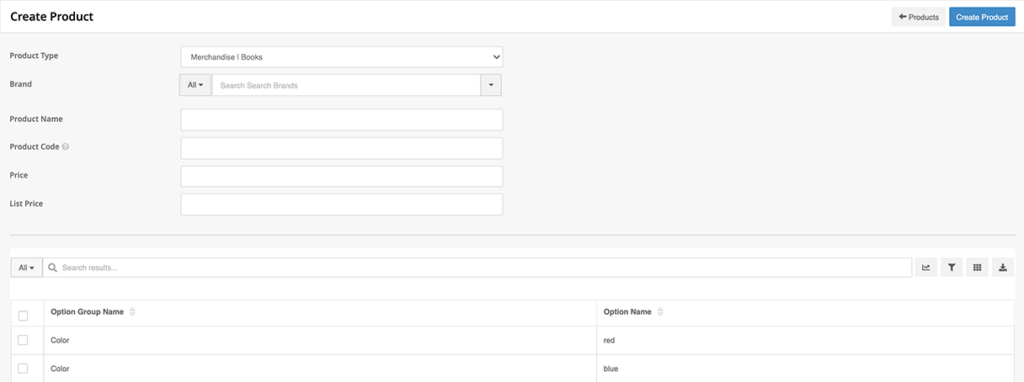
- Fill out the fields:
- Product Type: Select the appropriate product type from the drop-down. There will be Product Types in the drop-down if you have created specific merchandise product types.
- Brand: Select a Brand for the product if there is one associated with this product.
- Product Name: Add in a product name, this field is required.
- Product Code: Add in a product code that is a unique string (alphanumeric, no spaces, no special characters). This field is required.
- Price: Add in a price for the product. After the product has been saved, price can be fine-tuned at the sku level. This field is required.
- Options: Select the options for the product by placing a check mark in the box to the left of the option. After the basic fields have been filled in, options that are available for choice will display.
- Once all options have been selected and the basic fields are complete:
- Click the blue Create Product button in the upper right-hand corner.
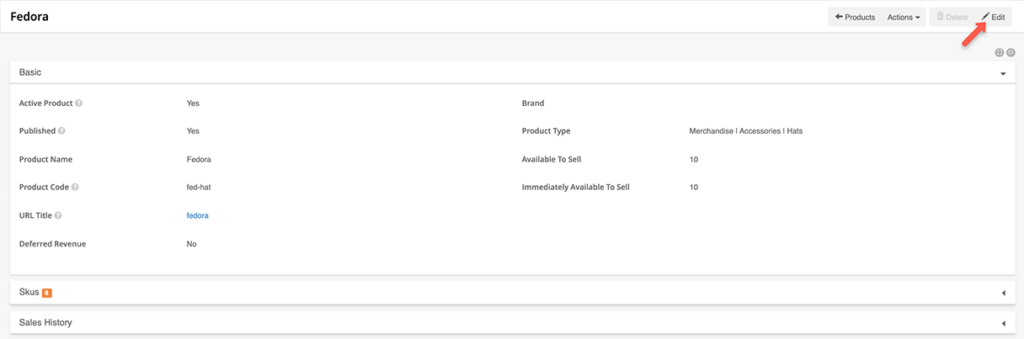
- The product detail screen will display in view mode – indicated by the pencil Edit icon in the upper right hand corner of the screen.
2. Sku settings for merchandise products:
On the product detail page expand the Sku Settings tab. Here you can override global sku settings at the individual sku level or keep them. You can set the settings to apply to all sites by clicking the All Sites tab while also having the ability to customize settings by site by clicking the specific site tab.
Note: Global Sku Settings are found by clicking the Config menu > selecting Settings on the dropdown> and expanding the Sku Settings tab
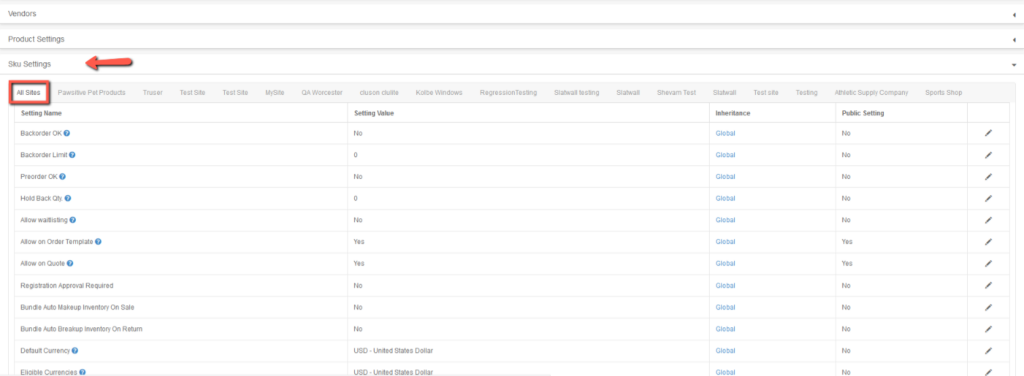
Here are a number of noteworthy settings:
- Allow on Order Template – This allows the skus to be added to an order template.
- Allow on Quote – This allows skus to be added to quotes.
- Allow add to Cart – This allows skus to be added to carts.
- Default Currency – Default currency can be set here.
- Eligible Currencies – Eligible currencies can be set here. Note that if a currency is not listed out of the box, one can be created in the Config > Currencies area of Ultra Commerce
- Eligible Fulfillment Methods – You can set eligible fulfillment methods here. If a fulfillment method is not available out of the box, it can be created in the Config > Fulfillment Method area of Ultra Commerce.
- Eligible Order Origins – Eligible order origins can be set here. If an order origin is not available out of the box, it can be created in the the Config > Order Origin area of Ultra Commerce.
- Eligible Payment Methods – Eligible payment methods can be set here. If an payment method is not available out of the box, it can be created in the Config > Payment Methods area of Ultra Commerce.
- Track Inventory – If you would like Ultra Commerce to keep track of inventory set this to yes.
- Tax Category – Tax categories can be set here. If a tax category is not available out of the box, it can be created in the Config > Tax Category area of Ultra Commerce.